my advice: have fun and play–play is learning | always be watching real life to see how things move | also be watching cool animations to learn from them | don’t wait until you’re ‘good at art’–animating will help you improve | it’s hard but so worth it when things turn out well, good luck!
here’s what i managed to came up with, hope it’s at least somewhat informative:
as you can see, the uniform itself is rather plain-looking, except for the sleeves. i get asked sometimes what’s the deal with the sleeves on my hogwarts uniforms, why do they look like that, how do they work and so on.
the thing is, i really wanted to make it look somewhat traditional, a little bit outdated like everything wizards wear, but also i didn’t want to go for oversized bell sleeves that are commonly depicted on wizard robes (if you’re wondering about the reasoning behind this, there’s none: i just have a very deep and irrational dislike for bell sleeves), so i did some researching and stumbled upon medieval hanging sleeves:
that’s where i ended up drawing my inspiration from. i think they look really neat, plus, as one of my followers later pointed out, with these sleeves there’s a lesser risk to get them dirty while brewing potions, haha
regular sleeves that i draw underneath them are part of the robes, not casual clothes (shirts, tees and whatever is worn underneath the robes is not visible unless you unbutton the collar). the design without them seems more sensible, now that i think of it, but i got used way too much to drawing both hanging and regular sleeves as parts of the robes (although hey, robes without regular sleeves can be a thing for warmer weather)
since i’m no clothing designer, i used to have doubts whether this design is functional/comfortable/sewable/wearable at all, but then a group of really cool people actually managed to cosplay it (click: 1, 2, 3), so i guess it’s not as unrealistic as i initially thought
i’m not very consistent in drawing them and i keep changing little things here and there (fastening, sleeves’ length, etc) all the time, but overall that’s pretty much it!
This one was a short weekly tutorial briefly talking about gesture drawing, shapes and how to reference. Next week I’ll do a reference sheet with dynamic poses, I didn’t get to it this week cause I ran out of time. Anyways I hoped this helped some people!
Yo! Get full access to all my tutorials/references through: Patreon:
[https://www.patreon.com/lunaartgallery] or Paypal Order: the 10$ package will get you 15 items of anything available on my Patreon, emailed directly to you.
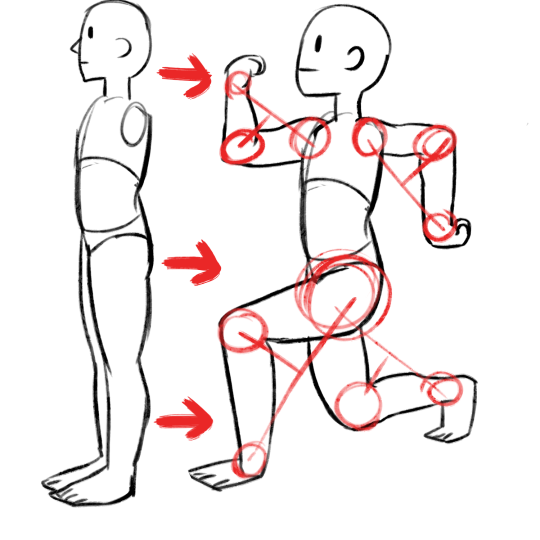
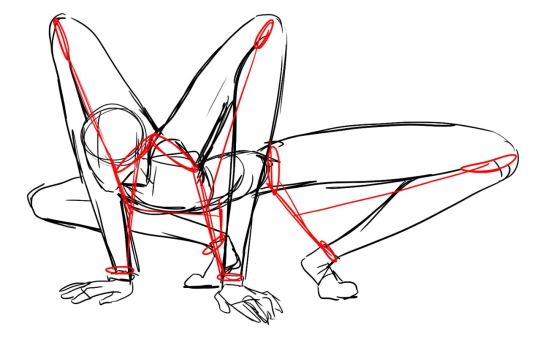
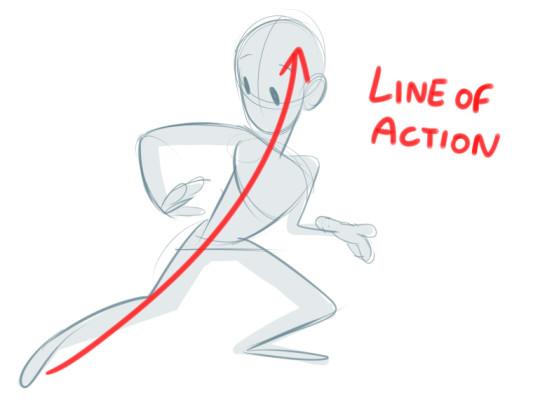
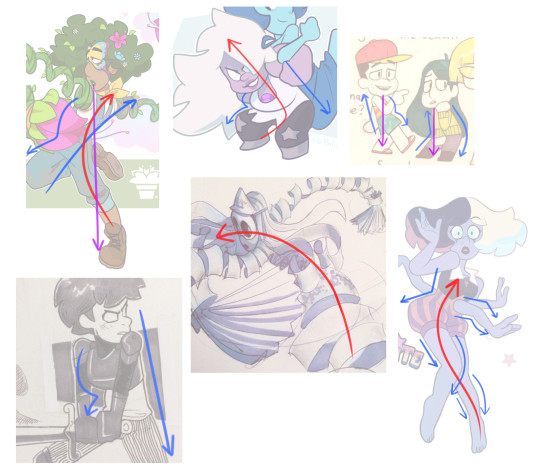
I guess three things I think of when it comes to poses are line of action, straight vs curved, and weight. I’ll use this quick awkward doodle to demonstrate:
You probably know this one if you know animation. Everything in the drawing doesn’t necessarily have to stick to it, but its a good basis for the overall silhouette. Most examples I’ve seen stick to one line, but sometimes I experiment with two if I’m going for a more action-y, dynamic pose. Its best not to go over two (two is risking it) as that would just get too visually confusing.
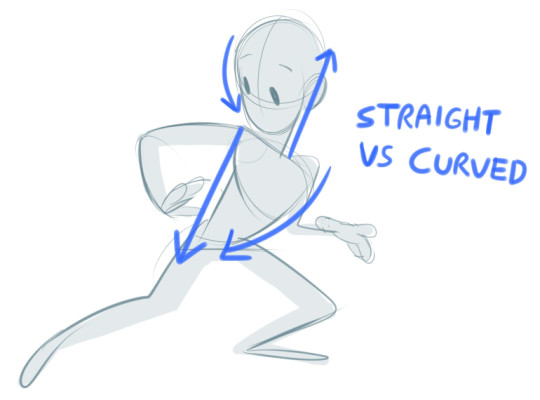
This one is more for smaller details, such as the arms and legs. Its good if you want to go for a more stylized look, since real life humans never have completely straight lines anywhere on their body. It’s basically contrasting a straight line with a curved one so you get a clearer idea of where the volume is going. Check out this video if you want more info, which is where I referenced from!
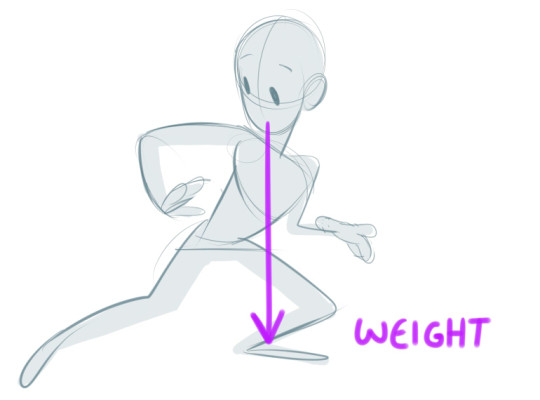
An easy one to forget in my experience. A little trick we learnt in life drawing class is that in real life the nose should generally be parallel to where the most weight is, to make it look more balanced. You’ll notice too that the body gets more compressed where the most weight is, ie the left leg here.
Some of my own (colour coded) examples, although I’m still learning to apply these things ~
(Sometimes if the nose doesn’t line up with where the body is leaning, you have to balance it out with the limbs or other body parts. The amethyst one would not work if she wasn’t holding another character on her back)
I recommend looking up these techniques online or in art books as you’re bound to find more in-depth tutorials and examples. But overall I hope this helps!
OKAY SO! @biazerod asked me a little help on storyboarding and i decided to make this tutorial…i’m not a professionist. so don’t take these as golden rules…just advices! and as always sorry for the english
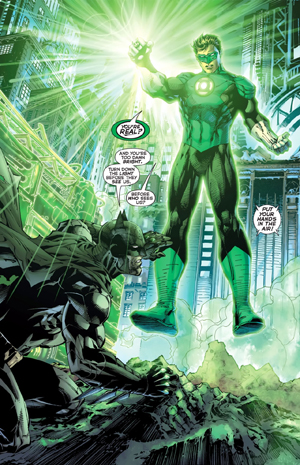
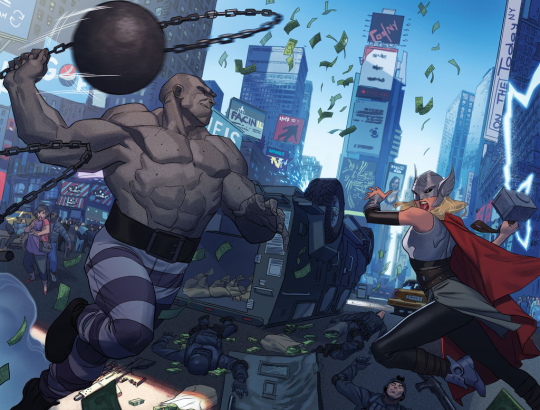
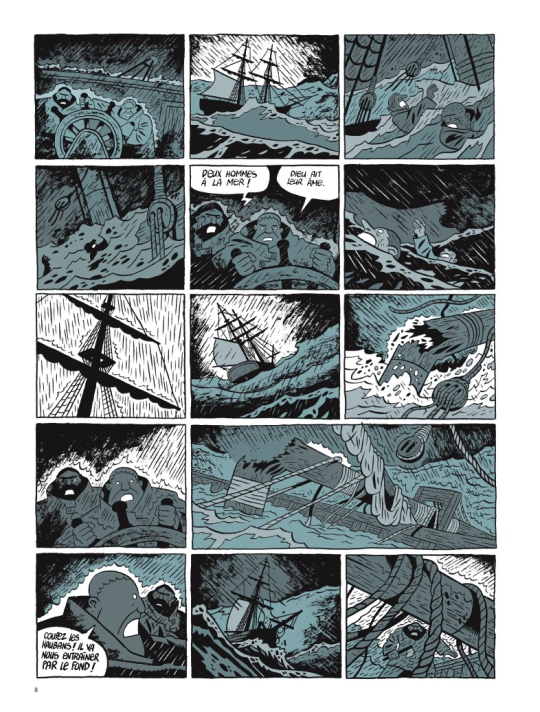
FIRST THING FIRST! the storyboard part is the most important phase in a comic page ! you can spend an entire day storyboarding! because it’s the structure, the essence of the page! here’s some tips : 1- a page can start from 1 panel/frame (called splash page!) until how many f*cking panels you can fit ! (some pages , especially in french comics/bd can reach 24 panels/frames!) Exaple of splash pages:
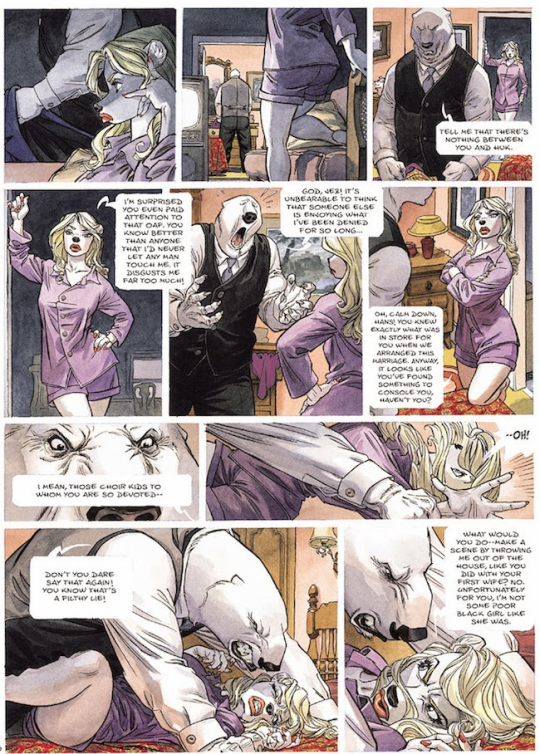
(these are from the green lantern,DC and the newest Thor ,marvel ) Splash pages are a priority of American comics, you rarely can find them in french Bd ! they represent a scene of impact! a fight! a revelation! be careful! use it only one if two times on a range of 50 pages! cuz it cut the narration! instead in french bd you find this :
first one is from Blacksad 2# and second one is from Atar Gull see how high the number of the frames is??
the number of frames is very important in a page because it decide the narration time! 😀 also it all depends on the kind of ‘’direction’’ you want to use on your comic! so be really careful when you decide the number of the frame! LET’S PASS ON THE CREATION!
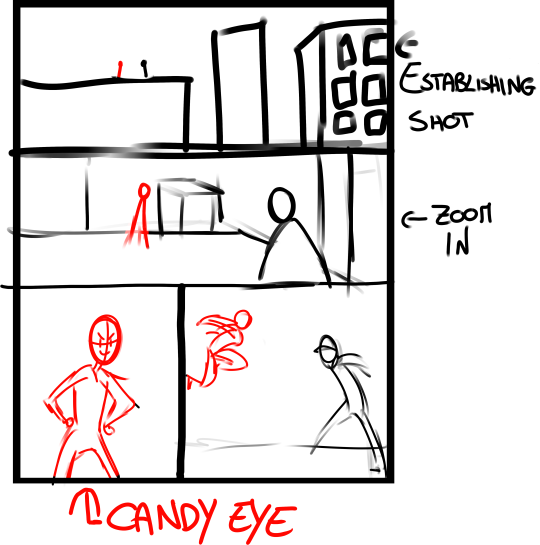
1- when you have a page that contains more than 3 Frames ALWAYS. ALWAYS HAVE AN ESTABLISHING SHOT!
the establishing shot is fundamental! BECAUSE READERS CAN UNDERSTAND WHERE THE CHARACTERS ARE!
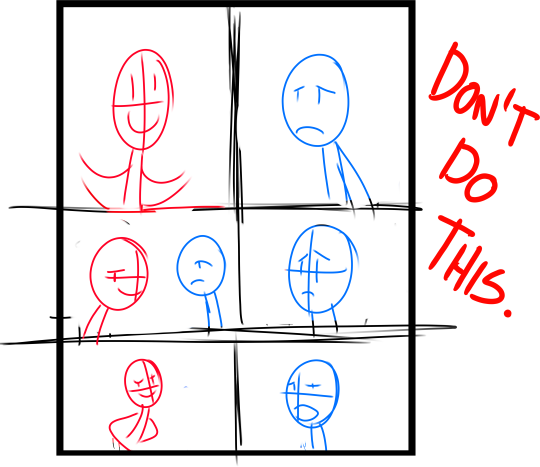
DON’T DO A COMIC PAGE FULL OF FACES !
DON’T DO THIS! LET THE CHARACTER BREATH! LET THE READER BREATH! PLAY WITH YOUR CAMERA! YOU HAVE THE POWER! in a comic page, is important to put the camera far away from the character most of the time! play with the different shots!
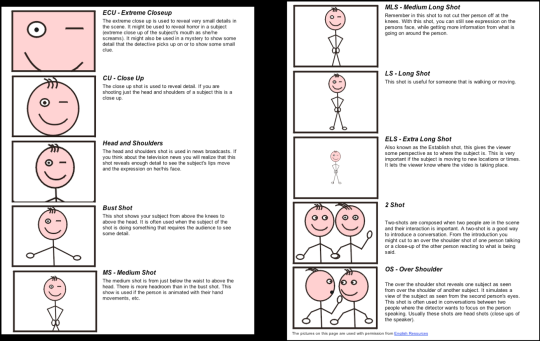
(found this on google) WATCH MOVIES AND TV SHOWS. lot of them can help you so much you have no idea! a comic artist and a director do the same job when creating a story
2- Candy eye this is a tricky trick that can help you with the audience! when a character is saying something important or you have to introduce them , USE THE CANDY EYE DUDE.
the candy eye is , basically, a bust shot where you show the character,their features , usually with a cool or a funny expression ( or of course it depends from the situation) and believe me WORKS 10/10 with the audience 😉
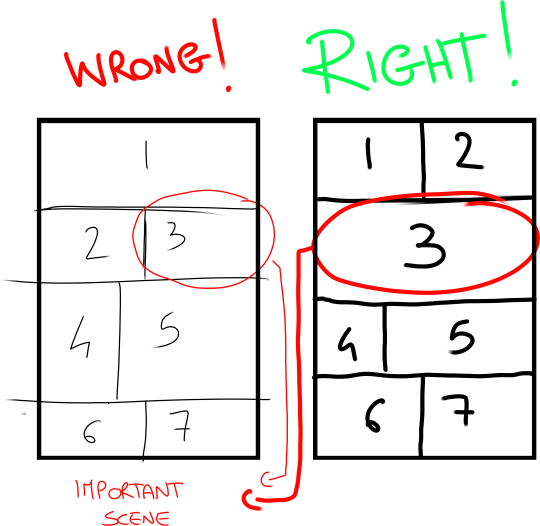
3- HIGHLIGHTS THE IMPORTANT SCENE IN THE PAGE!
FINAL TIPS: – when you’re doing dinamic poses try and try again! the first one isn’t always the best! -USE REFERENCES. –A STORYBOARD PAGE CAN REQUIRE EVEN 4 HRS IF NOT AN ENTIRE DAY IF NOT AN ENTIRE WEEK. REMEMBER THAT THE STORYBOARD IS THE ESSENCE. AND THE REST IS DECORATION. – IMAGINE THE SEQUENCE! NOT THE SINGLE PAGES. THINK IN SEQUENCES! imagine what would happen after the page you are creating! connect the various pages NOT THE SINGLES FRAMES ! YOU’RE CREATING A STORY! NOT A SINGLE ILLUSTRATION! -AGAIN DON’T DO PAGE OF FACES. most important thing:
if the page you’re creating it stresses you! STOP. continue it when you are in a better mood ,dude. our job requires lot of time and effort, but it should be the job we love. so don’t stress yourself and keep calm.
hope this is useful. don’t take this as golden rules, this is just the way i work 🙂
The program is called Sculptris and is a free off-shoot program from Zbrush, that program that you keep hearing about but either takes selling your kidneys or piracy to actually use.
If you download it and sculpt out a facial model, you can have references for your own work for all of time. No more endlessly searching Google for reference materials or twisting/rotating/flipping a drawing to see if there are flaws. And you can easily edit it to create more facial types. This way, you can make character references for any and every face and facial angle that you can think of.
The program offers mirroring right from the start, so your faces will be perfectly symmetrical. You can turn off the symmetry for things like scars or otherwise.
It takes a little time. For instance, I downloaded the program on Christmas and, in my spare time, this took a few days of getting familiar with the program (first day) and then sculpting for a few minutes each day, mostly due to my perfectionist nature. And this one isn’t even done. I still have to mold the mouth, ears, and other smaller aspects before I consider it done. However, I was so giddy over the possibilities that I wanted to share this with my fellow artists.
From now on, I have reference for a face in my own style and will be able to create things so much easier in the future.
I hope that this helps you guys and that you have fun with it.